Instructions & Setup Guide
Every PestBye deterrent is designed to be set up in ten minutes, with nothing more than a screwdriver and a rubber mallet. This guide walks you through each of the key devices and the common mistakes that cost a week of wasted results.
Popular PestBye deterrents
The hardware covered in this guide—open any listing below to confirm parts and current pricing before you install.
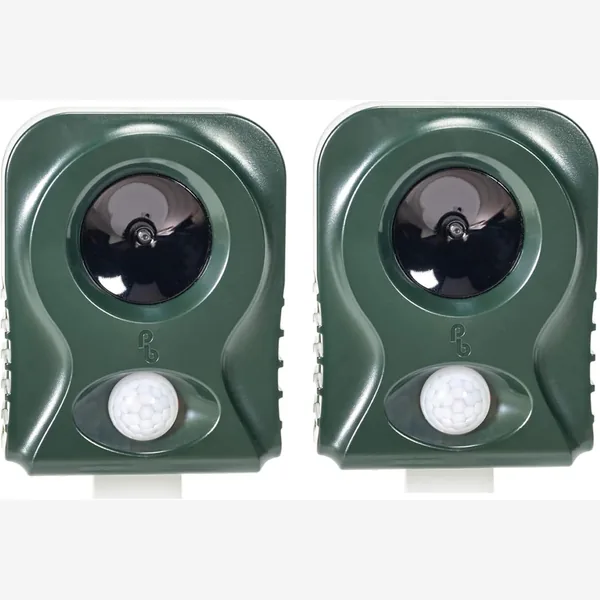
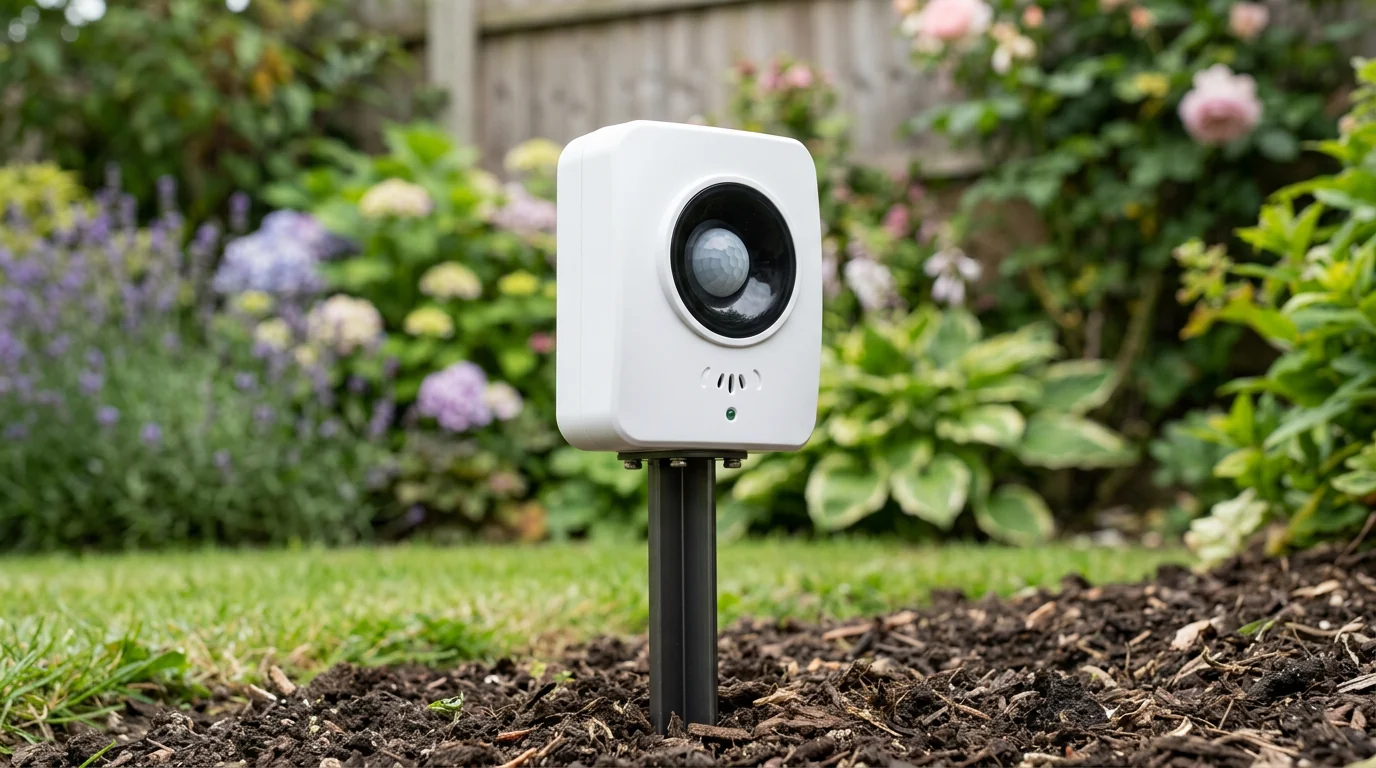
Battery Operated Cat Repeller V2 (Twin Pack)
Twin-pack ultrasonic stakes with HyperResonance sweeping and PIR detection—ideal when neighbourhood cats will not leave beds or lawns alone.
Check Price
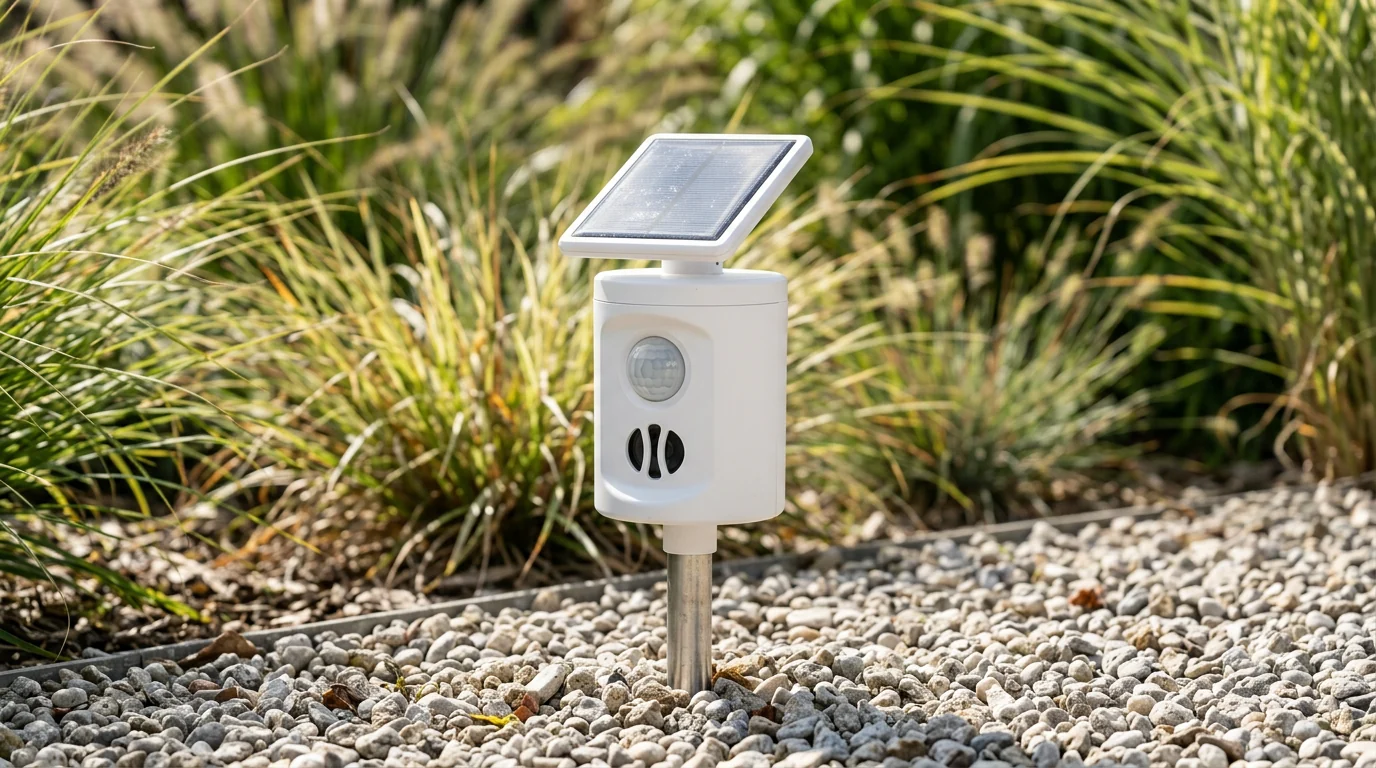
Ultrasonic Smart Link Solar Cat Repellent
Solar-charged waterproof stake with SmartLink pairing so several units fire together and cats cannot dodge a single point.
Check Price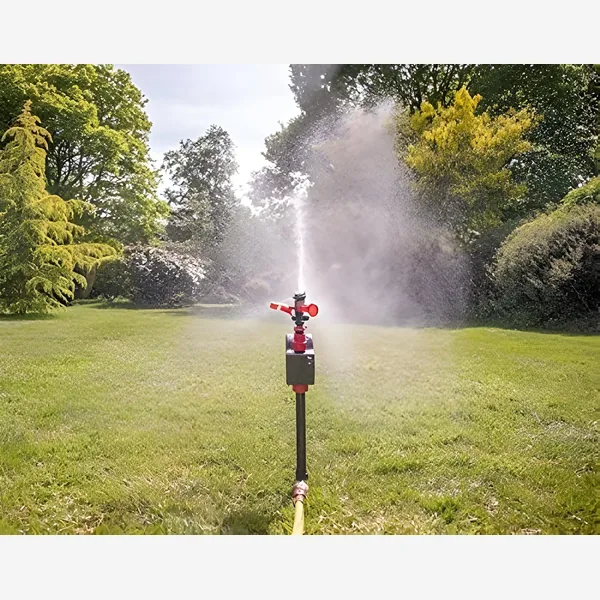
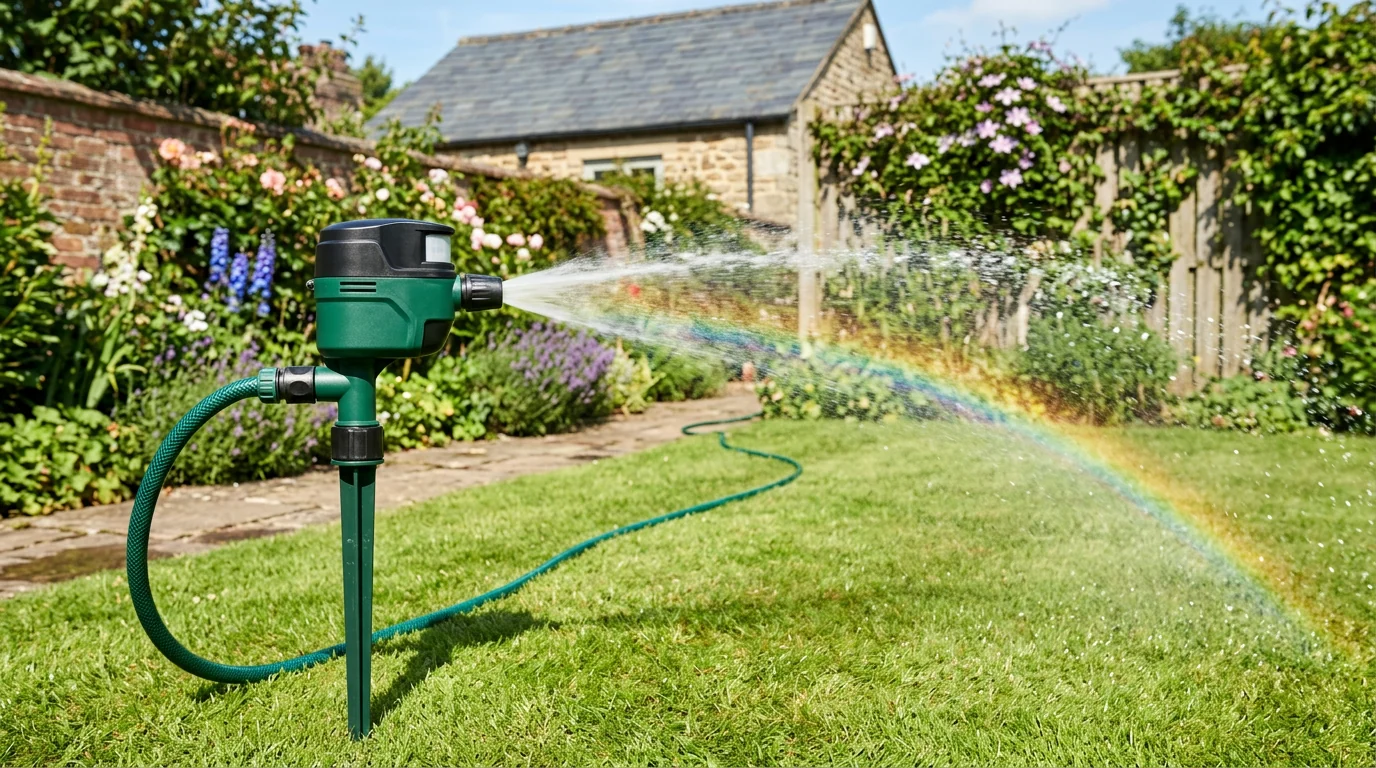
Jet Spray Motion Repeller (hose)
Hose-fed motion sprayer that fires a harmless five-second burst when wildlife crosses the sensor arc—highly visible deterrence.
Check Price
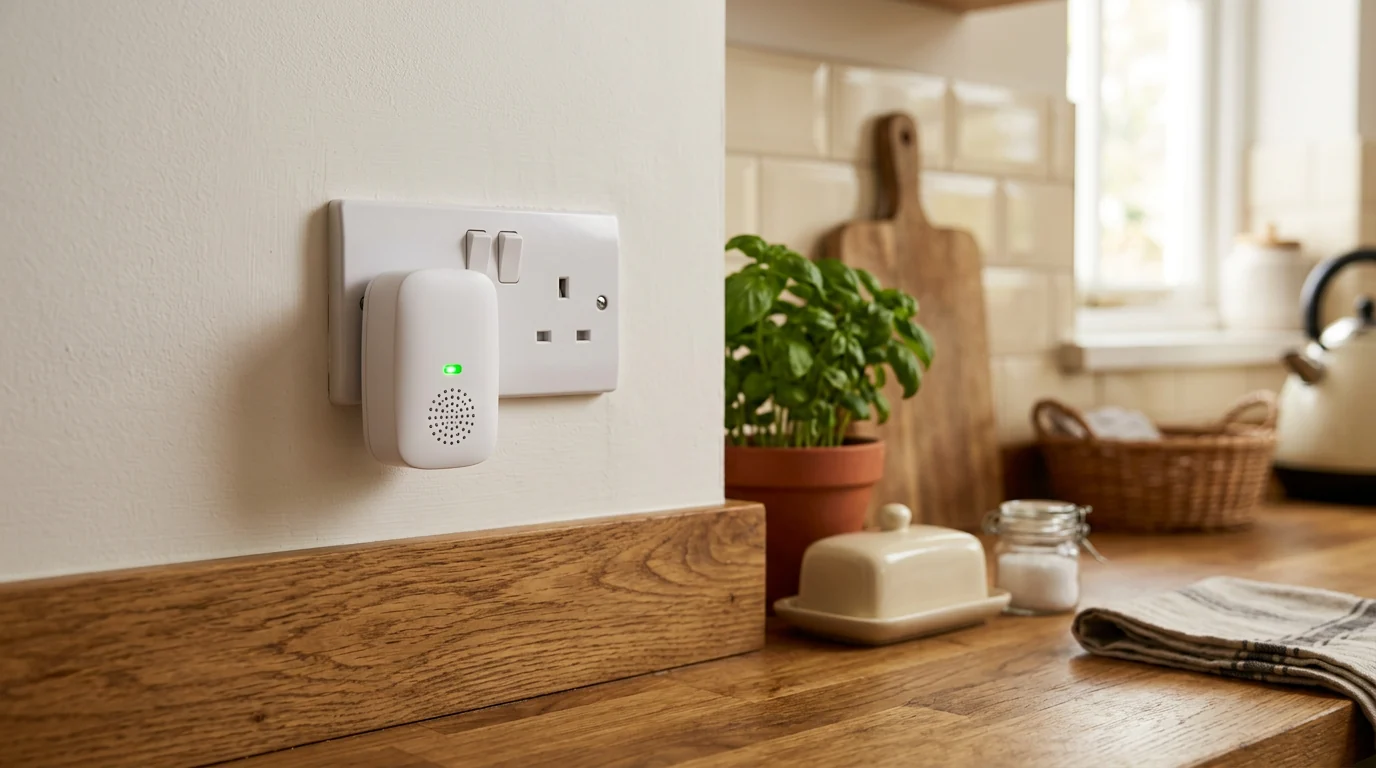
Advanced Whole-House Rat & Mouse Repeller
Plug-in ultrasonic and electromagnetic repeller designed to disturb rodents along ordinary household wiring runs indoors.
Check PriceBefore you start
A quick five-minute prep saves half an hour of fiddling. Before you open the box:
- Walk the garden at dusk and work out where the animal actually enters. Look for flattened grass, visible fur on a fence, or a worn patch at a gap.
- Check that the intended mounting spot has a clear view of that entry point, with no shrub or washing line in the sensor's line of sight.
- For battery units, have four fresh alkaline AA batteries ready. Rechargeable NiMH batteries also work perfectly.
- For the Jet Spray, have your garden hose run to the mounting location in advance.
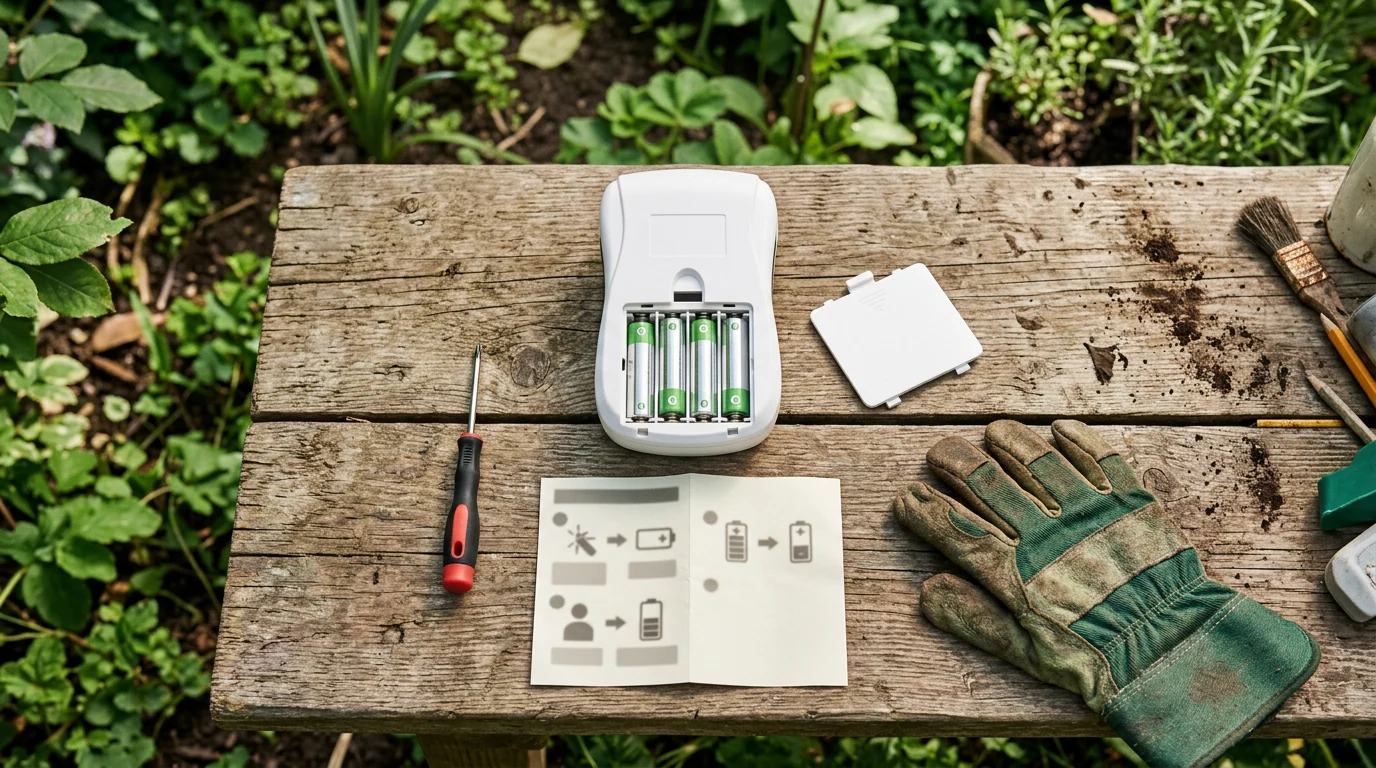
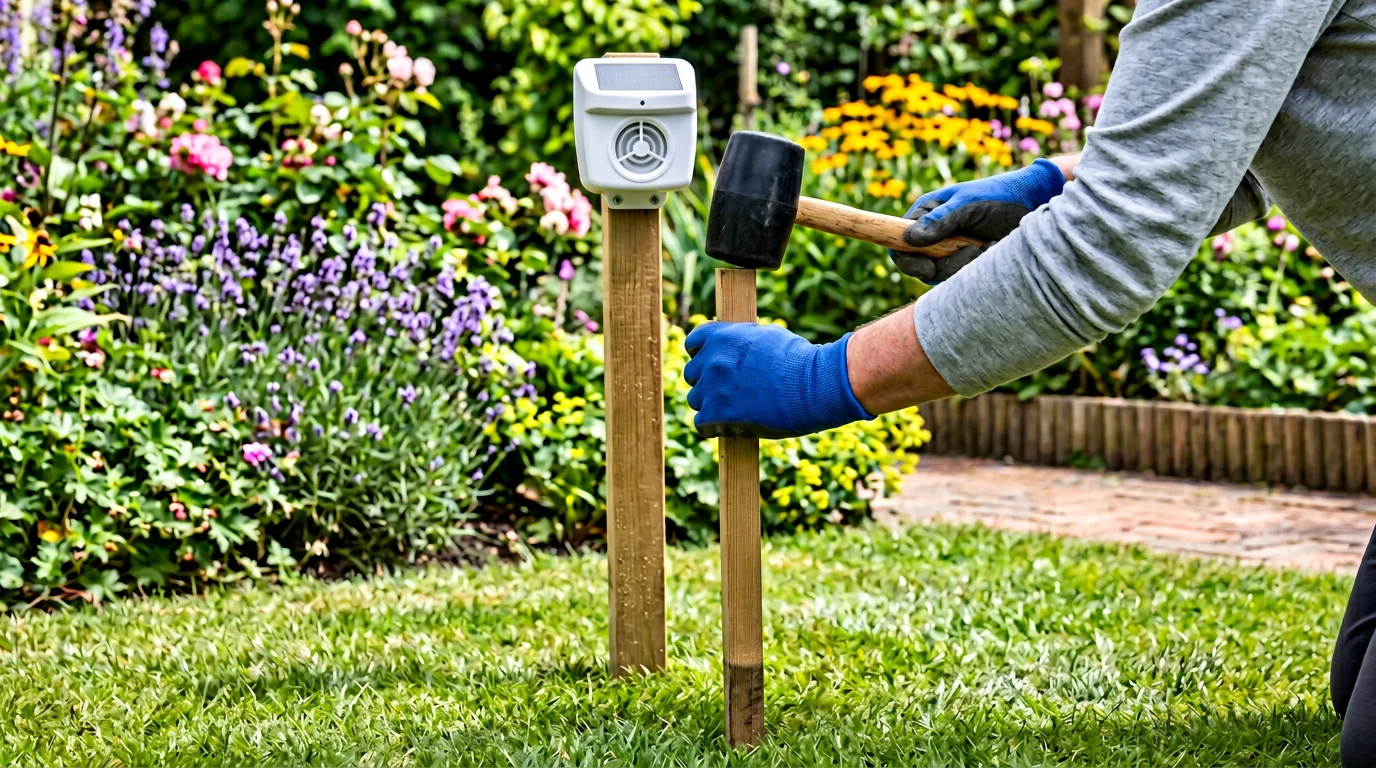
Ultrasonic stake (battery V2)
- Open the battery compartment on the back using the small Phillips screwdriver provided, insert 4 × AA batteries observing the + / – markings.
- Set the frequency dial to the appropriate band – see the frequency settings page. Setting 3 for cats is the most common choice.
- Push the stake firmly into soil to the depth mark. On hard or stony ground, loosen the soil with a trowel first – do not hammer the electronic unit itself.
- Aim the sensor at the entry point, typically a gap in a fence, the top of a wall or the middle of a favourite flower bed.
- Flip the on/off switch inside the battery compartment and close the lid. A quick blink of the front LED confirms the unit is armed.
Solar repeller
- Before first use, place the solar panel in direct daylight for four hours. This gives the internal cell its first proper charge.
- Tilt the panel towards the widest patch of open sky. South-west is ideal in most of the UK.
- Push the ground stake in. The unit does not use batteries – skip that step.
- Choose the frequency setting on the rear dial.
- Turn on via the small switch under the panel. The green LED confirms charging; the red LED flashes each time the sensor fires.
Jet Spray
- Insert 4 × AA batteries into the compartment on the underside.
- Screw the water inlet onto a standard 12.5 mm garden hose fitting.
- Push the stake into soil so the nozzle is aimed roughly at the target area – typically 2–3 metres ahead of the unit.
- Adjust the sensitivity dial (start at about the 50% mark) and choose day, night or 24/7 mode.
- Turn the water on at the tap. The unit is now armed.
- After the first trigger, fine-tune the nozzle so the water lands where the animal stands, not where it was.
Whole-house rodent repeller
- Plug into a three-pin socket at least 30 cm above the floor. Avoid behind furniture.
- Verify that the green LED is lit. Most models have two LEDs – one confirms mains power, the other confirms ultrasonic output.
- Leave the unit plugged in 24/7 for the first three weeks without interruption.
- Use one unit per floor. Large properties may require one per major zone.
Common installation mistakes
Across 15 years of British gardens, these are by far the most frequent reasons a deterrent "isn't working":
- Sensor pointed at the house. The PIR triggers on your family walking in and out, missing the cat.
- Mounted too low. Long grass or lawn mower clippings blow across the sensor and cause false negatives.
- Mounted on a sunny brick wall. The wall's thermal mass confuses the PIR in the evening; move the unit onto a stake nearby.
- Stake loose in soil. Wind movement makes the unit sway and mis-aim; bury it deeper or use the base plate accessory.
- Dead batteries in winter. Cold alkaline batteries drop in output long before they fail completely – check them every month in December–February.
Troubleshooting
"The LED flashes but the animal still visits." The LED confirms firing, which means the PIR is detecting. Double-check the frequency band (the cat may not match the setting you've chosen) and try HRF for a fortnight. See frequency settings.
"The unit fires in the wind." Either reduce the PIR sensitivity or tilt the sensor slightly downward so moving foliage drops out of the view cone. On the Jet Spray, lowering the sensitivity dial by one notch usually fixes it.
"Nothing happens at all." Check battery polarity first – this is the single most common fault. Then clean the sensor face with a dry microfibre cloth. If the unit is new and still dead, contact us at hello@thepestbye.co.uk for a replacement under the two-year warranty.
Seasonal maintenance
A simple yearly cycle keeps every PestBye device in top condition:
- March: Fresh batteries, wipe PIR lens, reconnect Jet Spray hose after winter storage.
- June: Check the solar panel for leaf debris.
- September: Replace batteries before winter. Lower the stake height for autumn leaf fall.
- November: Drain and store the Jet Spray indoors until spring.
Getting more from the system
Our best customer outcomes come from layered installations: a solar stake on the main boundary, a battery V2 on a problem border and a Jet Spray on the pond or fence-line trot. If you'd like to tailor this further to your specific garden, read our reviews page where other gardeners describe exactly what they did, or email us with a quick sketch and we'll reply with suggestions within 24 hours.
Set it up once. Enjoy your garden again.
Pair the right deterrent with the right sensor placement and British gardeners consistently see a calmer, tidier garden within a fortnight.